Friday 5 September 2014

Curbside Find: A Vintage Lamp

Hey everyone!  Today's post is going to be about this cute, vintage lamp I found someone throwing out.  I loved the brass base with the black post but I wasn't quite sold on the lamp shade, itself.  I guess it doesn't look too bad in this picture but in person it was really ugly.  It was a kind of creamy tan fabric with darker brown flecks scattered throughout it.  I definitely loved the base, though, and for free (!!) so I decided I could try and do something with it and revamp the shade into something a little more fresh.

Here's a picture of the lamp before I did anything to it:


I especially love the on/off flick switch! Such a cute vintage find!


From a previous garage sale, I had this giant Aztec/Mexican print blanket.  I bought it for only $1 but when I got home I discovered it had some white paint blotches on it (note to self: next time check blankets thoroughly before buying!). I wasn't too bothered though, because hey, It was only a dollar and I still liked the print and thought it would be nice to use as fabric.  After checking if this fabric went with the base of my lamp, I decided to use it for the lamp shade.  You probably have an old lamp or shade lying around the house that could use a revamp, if so, this project is for you!

Materials Needed:

Lamp Shade

Fabric

Hot Glue Gun & Glue Sticks

Scissors

Sounds easy, right?


There may be an easier way to do this, but here's what I did. First, I draped a large piece of the fabric over the shade. When you have the shade covered with material, you can cut off the excess fabric you won't be using.  Make sure you have extra fabric to spare when covering the lamp as it's always better to have too much and cut it away versus having too little and then having to redo the whole thing.

Once I had my shade covered and the excess fabric cut away, I poked the fabric covering the centre of my lamp shade and cut it to reveal the hole in the middle.  Once again, make sure you don't trim the fabric too close to the shade as having more is always better.  Remember, you can always trim away excess fabric after!


Once you have your hole cut you're ready to start glue gunning!  The lamp shade is divided into quarters so I started with 1 of the quarters and glued the fabric to the inside of the shade hole.  Then I glued the fabric to the lamp shade itself, pressing firmly and stretching the fabric so there were no bunches or ripples in the fabric as I went along.  As long as your glue is hot, you really don't need to use that much. Wait to glue the fabric to the bottom of the shade (up under the base) until the end. 

Once I had finished one quarter, I started on the second.  Just repeat the process and always remember to keep the fabric taut with no slack.  Repeat this process for the third quarter and then stop before you move on to the fourth, and final, shade quarter.  You will notice you have an excess of fabric and nowhere to glue it all.  Now, you will need to create a "seam" and cut your fabric (you can see my "seam" in the picture below).  Before cutting the "seam", trim away the excess fabric that you don't need, while remembering to keep enough to cover the last quarter of the lamp shade and a straight "seam". Once the excess has been trimmed, line up your fabric and make a straight line with the first quarter.  Cut your "seam" so that it's straight and even.  If the pattern of your fabric doesn't line up properly, that's okay.  This seam can always be at the back of your lamp and therefore not as noticeable.  

Once the fabric is cut and you have your seam, you glue the remaining quarter of your lamp shade.  When this is finished, you will need to trim the excess fabric from the base of the shade. Remember to keep a little excess so it can fold under the bottom and be glued.  Once it is trimmed, you can glue the remainder of the trim to the underside of the lamp shade.  

After you have completed the shade and all the gluing, you can retouch some areas, pull off any loose threads, or trim any excess fabric that remains.  Also, when using a hot glue gun, you'll probably have some loose strands of glue left behind.  Remember to clean these off as well.

In the photo below you can see my "seam.  The seam is the tan fabric on the left side of the lamp.  Perhaps you notice that the fabric doesn't quite line up.  There is a diagonal print and then a straight line print.  I actually kind of like it this way, but if you don't, you can always turn the "seam" side of the lamp towards the wall where it will be less noticeable.


The finished product!


In total, this project took about an hour of my time and cost less than a dollar.  The lamp was free as it was being thrown away and the fabric (the blanket) was only $1.  Because I have a lot of fabric left over that I can use for future projects, I'll say that it cost less than a dollar for this one.

If you have an old lamp or shade lying around and some cool looking fabric this might just be the budget project for you! 
Thanks for checking out my blog and have a great weekend! :)


Wednesday 3 September 2014

Budget Travel Tips: Venice

Europe is an expensive continent to travel in and I find most countries that use the euro are a little more pricier. So, when we planned a recent trip to Italy, I made sure I researched all the cities we would be staying in and planned out a strict budget for us to follow.  In Rome, Florence and Milan that seemed to be easy, but Venice? That was a different story.  When researching hotels and where to stay, I was shocked to find even the "budget" accommodation to be pricey.  I think in the end I managed to plan a stop in Venice that allowed us to explore and see the city, while maintaining a strict budget.

Without further ado, here are my tips for travelling on the cheap in Venice.


Accommodation

This is one of the most expensive parts about travelling.  It also can be difficult to find quality accommodation while on a budget.  If I had been travelling solo, I would have had no problem sleeping in a hostel dorm. Since my husband and I were going on this trip together, we wanted it to be a little more "fancy".  In Rome and Florence we managed to find beautiful accommodation through the website Airbnb.  Unfortunately in Venice, there weren't many places to stay through that site and the few I could find were extremely expensive.  I gave up trying to find a fancier place and just settled for cheap, centrally located (we had an early train ride one morning so being near the sights AND the train station was a bonus) and someplace that was on the ACTUAL island of Venice. We only had two days to explore and I didn't want to waste it in transit back and forth each day.

We ended up staying at a hostel called "Ostello Domus Civica".  The pros were that it was centrally located, close to the train station, cheap and got good reviews. The cons were that although we had our own room, we had to sleep in bunk beds. Also, we had to share a bathroom with the entire floor (although we had our own sink in the room).  In the end, 112 euros  for two nights accommodation for two people wasn't that bad (and this was the cheapest I could find on the island).  When we arrived, we were pleasantly surprised as the room was big, bright, clean and had lots of closets and drawers to put your things.  Another perk was the giant rooftop terrace where we could overlook the city and enjoy our dinner every night.  It certainly was a nice way to end a hot and tiring day of sightseeing!

Our supermarket-bought dinner on the hostel's rooftop terrace. Yum!


Food

The next biggest cost when travelling is food.  Unless you want to spend every day of your trip eating ramen noodles, you're going to have to spend a little money.  I found that Italy had such delicious food, it was easy to buy a super cheap, no frills meal and still feel like we were eating like kings and queens.  When I was researching Venice, I found that many people recommended filling up on "cicchetti", which are small snacks or side dishes that are served in tiny bars in Venice.  These snacks typically cost only 1 or 2 euros each and can provide a tasty meal without denting your wallet.  While we did wander around and check out a few of these cicchetti bars, we ended up finding some other recommended budget eats elsewhere.

We had lunch at "Antico Forno" (located at Sestiere San Polo, 970) and it was delicious while being very budget friendly.  Main dishes were around 7 or 8 euros and the restaurant had a comfortable atmosphere.  It wasn't anything fancy, by any means, but it was extremely tasty food.  I heard that they also sold pizza to go by the slice (an even more budget-friendly option), but we chose to eat in the restaurant.

Lunch at Antico Forno.


Another place that's on my "must go" list is "Alfredo's -Fresh Pasta To Go" (located at Calle De La Casseleria, 5324). This was definitely one of my most favourite meals in Italy and THE.BEST.PASTA.EVER. Seriously. I'm getting hungry just thinking about it. The deal with Alfredo's is that it's a tiny, hole in the wall place. They don't even have a sign outside!  You just have to find your way to the general area where they're located and then kind of just follow your nose (and the sight of increasingly more people eating delicious looking pasta in white take-out containers).  You go in, stand in line, pick the kind of pasta you want, pick your sauce, pay 7 euros, wait about 5 minutes and voilĂ ! Best pasta of your life.  The sauces and pasta are all freshly made, piping hot and mouth-watering good.  They don't accept credit cards and the place is so small there's nowhere to sit inside.  Just get your take-out container and find a stoop or bridge somewhere and sit down and enjoy!


Alfredo's Fresh Pasta To Go. This photo doesn't nearly do it justice.


Finally, at the end of my food list is Caffe del Doge.  This cute little cafe is where the locals go to get their coffee in the morning. The prices are reasonable but the real upside of this place is that they don't charge a service fee for sitting at the table.  


Sightseeing

Venice is a very expensive place to go sightseeing.  When travelling on a budget you need to prioritize what's important for you to see and what's not.  We got most of our paid (and free!) sightseeing done in Rome and Florence. While it would have been nice to check out the Doge's Palace and the Gallerie dell'Accademia we had to ask ourselves, would we really regret not seeing them? The answer was no.  We chose to spend our sightseeing budget on places we were absolutely dying to see, and try to enjoy as many free sights as we could the rest of the time.  I'm going to be honest though, in Venice there's not really that much to see for free.  Sure, you can always walk around and just explore the quaint, meandering streets (and this is something you should do anyway), but there wasn't much to see by way of actual sights.  I actually found Rome to be the best for free sightseeing.  Regardless, there are still some things you can see:

Churches: Most churches are free to enter. You just need to make sure you're dressed appropriately and it always helps to keep a shawl in your bag to cover your shoulders.  Many churches we explored we just happened to stumble upon by accident. Some other options are San Zaccaria Church and San Giovanni in Bragora.

Besides wandering around the streets, you can also wander around the exterior of the Doge's Palace and Piazza San Marco, along with checking out the Bridge of Sighs.

 It's always great to stroll along the Grand Canal and walk across the Rialto Bridge as well. We did this several times during our stay.

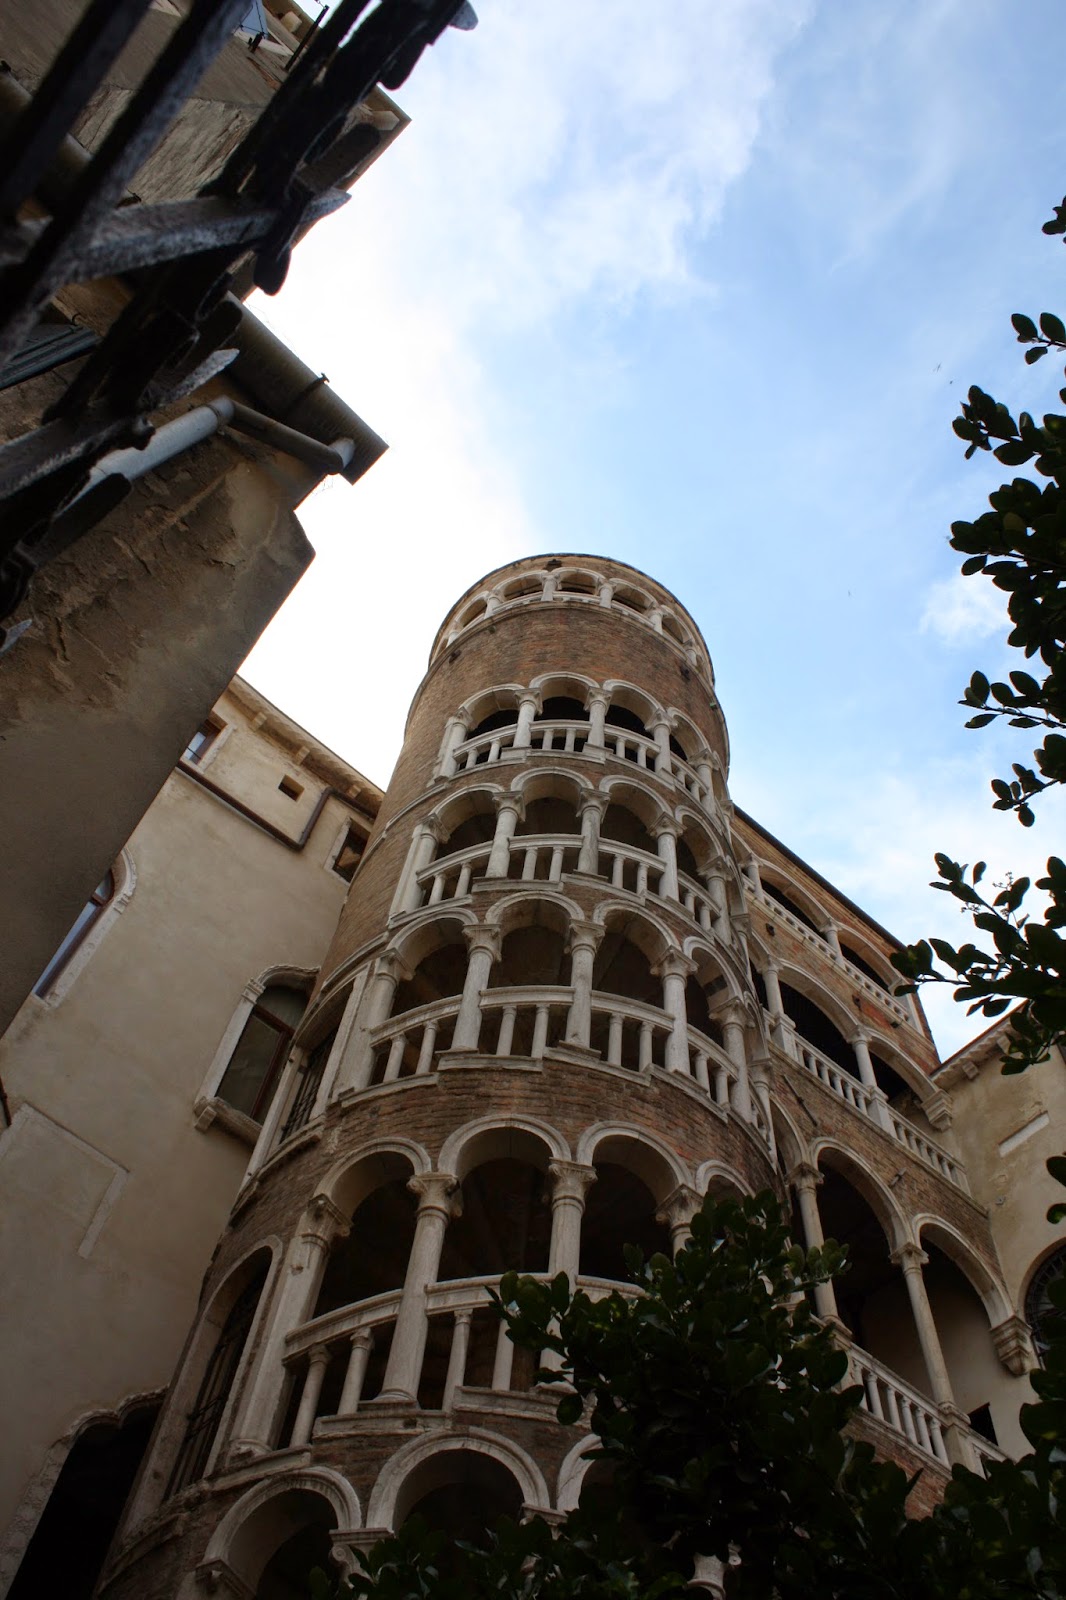
There's also a beautiful renaissance spiral staircase that was built around 1499. It's called  Scala Contarini del Bovolo and locating it might be a little tricky but it's worth it to see.  It's down a small alleyway in a courtyard. You can't actually go near the stairs as the area is fenced off, but you can get close enough to see it and take some photos.

You can also check out Campo San Barnaba, the church where Indiana Jones and the Last Crusade was filmed (it was used for the exterior library shot).


Scala Contarini del Bovolo, a renaissance staircase.


Campo San Barnaba. Do you recognize it from Indiana Jones?


Gelato

When creating a budget for our Italy trip, I made sure to factor in gelato as an expense all on its own.  Little did I know, we needed a lot more of a budget as getting gelato at least twice a day became a necessity. Trust me, you'll want to plan a budget JUST for gelato. A typical cup or cone costs around 3 euro.  My favourite place in Venice (and one of my favourites from the entire trip) was a little, out of the way place called "La Mela Verde" (located at Fondamenta de L'osmarin-Castello).  


I could eat 3 of these cups right now...


Gondola Rides

In Venice it seems THE thing to do is take a ride in a gondola. Actually, this is probably what most people think of when they picture the city.  Does this mean we went for a gondola ride while we were there? At those prices?!?! You must be joking.  A ride in a gondola is not the most budget-friendly thing you can do while travelling in Venice. Sure, you get to have the experience and it seems like it can be a bit of a novelty but I'd rather not pay almost my entire accommodation budget for 25 minutes of bobbing around in a tiny boat.  The going rate for a gondola ride is 80 euros for 25 minutes or 120 euros for 45 minutes. Can you believe that!?  45 minutes in a gondola costs more than what I paid for 2 nights accommodation.

So, how does one get the gondola experience without the sky high prices? There are a couple options.  The first one is very cheap: simply take a traghetto (an oversized gondola rowed by two gondolieri) across the Grand Canal for 2 euros.  There are several links to do this up and down the Canal and the ride lasts 5 or 6 minutes.

A more expensive option (but worth it if you want more out of your experience and more time in a boat) is to do a rowing lesson through the company "Row Venice".  The lessons last about 2 hours and can provide a great memory for your trip.  We considered doing this option but decided against it in the long run as we had a very short stay in Venice and didn't want any time constraints.  It looked like a really cool experience, though, and well worth the money since you're actually getting a lesson and a ride out of it.


Some other tips for Venice
(Some of these may seem obvious)

Water: I always travel with a water bottle.  1 or 2 euros for a bottle of water might not seem like a lot, but it can add up quickly if you go through several bottles a day (especially in the heat of summer!).  The thing I loved about Italy was that it had fresh water spouts all over the cities with free flowing, icy cold water. This was very convenient when our water was running out or getting too warm in the heat.

Souvenirs: The closer you are to popular touristy areas, the more expensive souvenirs and postcards will be. Just venturing a couple blocks away from the main sights might save you a few euros. This also applies to restaurants and food.

Supermarkets: While we were in Venice we bought all our dinner groceries, snacks, drinks and alcohol from the local supermarket.  Buying items this way is way cheaper than buying them at overpriced food stalls or at convenience stores.

Walking Tours: Before travelling to a new city, always check online to see if there are any free walking tours offered.  We didn't go on any organized free tours in Venice, but we did use Rick Steve's audio guides.  We used one iPod with a headphone splitter and wandered around doing our own tours.  You can download Rick Steve's guides and maps for free on his website.  It's a great way to explore the city and find out interesting information for free.


Thanks for checking out my blog and budget travel advice for Venice. Have a great day! :)


Tuesday 2 September 2014

Garage Sale Find: Old Jars

Hey everyone!  
This past weekend I was at a garage sale and purchased two huge boxes full of jars (including some vintage, blue and clear mason jars with glass lids that I'm really excited about!). Both boxes cost me only $5!  When I got home I discovered that there were 14 small (and extremely cute) glass jars that were probably used at one point for jam or something.  I thought these jars would make perfect juice glasses and so this project was born.  Check out the instructions and pictures below on how I made personalized juice glasses from old jars.

The before and after shots:


First things first, you need to get some jars.  You may have a nice set lying around your house already. If not, garage sales and thrift stores are your new best friend!  This project can also be made with store-bought glasses.  To keep this project budget-friendly, check out a dollar store (my dollar store of choice is "Dollarama") for some cute, albeit cheap, glasses.

My jars looked like this:


After you find the perfect jars, you'll need to gather the rest of your supplies.

Materials needed:

Jars or glasses of your choice

Tape (I used painter's tape)

A marker that can write on glass 

Stencils for tracing

Scissors


For my tracing paper, I first downloaded a font from a font website (I use fontspace) and the font I chose is called "VintageOne".  After I had my font, I typed up the phrases in Microsoft Word and then printed them out.  Once printed, you can cut the phrases into smaller squares that will fit inside your glasses.  

For my phrases, I had two different themes I was trying to decide between.  The first theme was "Good Morning" written in different languages (For example: English, Spanish, French, German, Igbo, Polish, Japanese and Korean) and the second theme was "Morning Phrases".  I chose to centre my juice glass phrases around the morning time as that is when I drink juice.  In the end, I decided to go with the morning phrases vs. the different languages.


Once you have all your phrases printed and cut out it's time to tape.  Place the phrases facing downwards and put the tape around the edges (sticky side also facing down).  I chose to use painter's tape as it's easy to stick on and peel off again.


After you have applied the tape, place you tracing paper inside the glass and get it centred and lined up evenly.  It's important to keep in mind that the glass can taper off towards the bottom so you need to take this into account when taping.  If you don't, your letters can turn out a little wonky towards the bottom or start off small and get really big.

Once you have everything just perfect, it's time to start tracing.


After you have finished tracing, you can peel off the paper and check out your handiwork!


Once your glasses are complete, let them sit and dry for some time (preferably overnight).  The paint marker I used was very quick drying but I still didn't touch my glasses until the next day to be safe.

I would also recommend hand washing only.  The glass marker might hold up fine in the dishwasher but it's better to be safe than sorry.


After your glasses are dry, it's time to break them in with some delicious breakfast and juice! Cheers! 


All in all, this project took 3 hours of my time and cost me $4.50 to make.  I had all the supplies except the jars ($1 from a garage sale) and the glass marker ($3.50 from Michaels after a 50% off coupon).  I got 14 juice glasses in total: a set of 6 which I will be keeping, a different set of 6 for a family friend and a set of 2 for another friend.  

I hope you enjoyed this post and thank you for checking out my blog! Have a great day! :)

Garage Sale Find: Artwork

Hey everyone!  So I've been meaning to do this project for awhile now, I just didn't have a canvas/piece of art to paint it on.  Two weekends ago I found this piece of art at a garage sale for $1.  I liked the art on its own, but I wasn't sure if I LOVED it.  I decided to buy it anyway as I knew I could always make this project if I chose not to keep the original artwork.  After hanging the painting in various areas I figured out I would like to paint over it more than keep it.  To make this project you just need a few materials, and you can easily use any art that's lying around your house. Garage sales and thrift stores are great places to find cheap pictures or art as well. Just make sure you find something for cheap and something that you are not absolutely in love with (as you're going to be covering it with paint).

Here are the before and after shots of my little art project. Check out the steps listed below to make your own wall art!


First step is finding a piece of art.  Like I said, I found this at a garage sale for $1. 


Next, you need to gather your materials.  Here's what you need:

A piece of art (a picture, a paint by numbers, etc.)

Spray paint in the colour of your choice (I picked white)

Stick-on letters (make sure these can be removed and reattached easily).  I bought my stick-on letters from Michaels (a craft store) for $5.75 after a 40% off coupon.

Something to write on your picture (a quote, poem, single word, whatever you feel like).  I picked this poem from an online poet called Erin Hanson (e.h).  You can check out her work by googling "The Poetic Underground".  The poem I chose to use was this:

There is freedom waiting for you
On the breezes of the sky,
And you ask "What if I fall?"
Oh but my darling, 
What if you fly?

Obviously to write something this long you need a bigger canvas, which I had, so it worked out perfectly.  If you have a smaller canvas a single word or a short quote might be a better option.


Once you have all your materials ready, you can begin!

I started by cutting out the letters I wanted to use and lining them up on the canvas.  This way, you can make sure you have room to fit everything.  I put little dots with a marker to show where I planned on the sentences beginning and ending.  As you can see from the picture below, I didn't have enough letters to write the entire poem at one time.  Seeing as I was trying to make this on a budget, I didn't want to buy more than one pack of letters.  The easy way to do this would be to have more letters or to have a shorter quote.  I decided to spray paint the canvas in stages versus all in one go.  This was more time consuming but was my only solution without buying more letters.


Here's the first sentence down and ready to be painted.  I made sure to cover the rest of the canvas so it wouldn't get paint on it.  Remember, this is only necessary if you can't spray paint your canvas all at once.


A few coats of spray paint were needed to cover up the background.  You don't have to worry about the letters being completely covered as you're taking them off anyway.


Here's the second, third and fourth sentences down.  I had to cover the bottom and top of the canvas now.


Fifth and sixth sentences before painting.


Last two sentences ready to be painted.  Like I said before, this would be a lot easier and quicker to paint all in one go.  If you can do that, I would definitely recommend it. If not, painting it in stages turned out fine for me but it took more time.


After your canvas is dry, you can peel off the stick-on letters.  I wanted to save my letters for future projects so I peeled them off and stuck them on a piece of parchment paper.  I also kept the outlines of the already used letters as they might come in handy for another project as well.


Now your art is ready and you can hang it on the wall!
As you can see, I forgot to add one comma and a question mark when I wrote out my poem. Oops!  
Let's just ignore that...

I also didn't use any ruler or device to keep my sentences in line. It turned out alright but if I did this project again I would definitely recommend using something to keep the sentences all lined up and straight.  


All in all, this project took me 3 hours to make and cost $5.75.  I already had the spray paint, the art was $1 and the stickers cost $5.75 from Michaels after the 40% off coupon.  If you visit the Michaels website you can find printable coupons that you can use as well.  I found these letters worked perfectly as they are made with vinyl and it was very easy to peel and stick them again and again.

Thank you for checking out my blog and have a great day! :)